
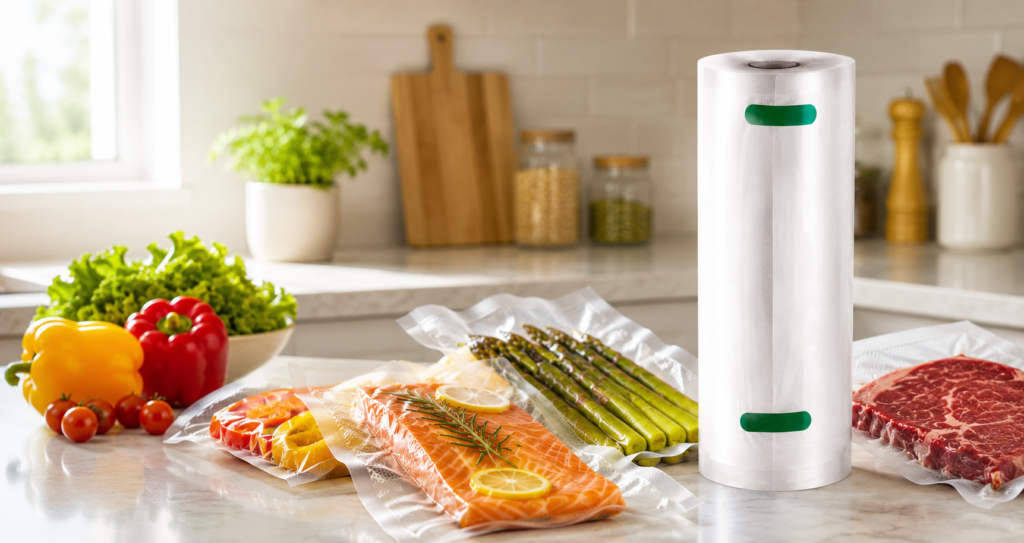
If you just bought a vacuum sealer roll and you’re staring at it wondering where to even begin — you’re not alone. Most people have seen these rolls at a store or on Amazon, thought “this looks useful,” brought it home, and then let it sit in the kitchen drawer for three weeks.
The thing is, once you use it even once, you’ll wonder how you managed without it. Vacuum sealer rolls are genuinely one of the most practical kitchen tools you can own — especially if you buy groceries in bulk, cook in batches, or just hate throwing away food that went bad too soon.
This guide walks you through everything from scratch. No assumptions, no rushing. Just a proper, easy-to-follow walkthrough for anyone using a vacuum sealer roll for the first time.
What Exactly Is a Vacuum Sealer Roll?
Before we get into the steps, a quick explanation for anyone still a bit fuzzy on what this product actually is.
A vacuum sealer roll is basically a long sheet of plastic film that comes on a roll — similar to cling wrap, but much thicker and made to work with a vacuum sealer machine. Unlike pre-cut bags, a roll lets you cut the bag to whatever size you need. Sealing a tiny packet of spices? Cut a short piece. Need a bag for a whole chicken? Cut a longer one. You’re never wasting material or cramming food into a bag that’s too small.
The Homepixi Vacuum Sealer Roll, for example, comes in two sizes — 20cm and 28cm wide — and each roll is 5 metres long. It’s made from 100-micron thick, BPA-free material that’s safe for freezing, microwaving, and even boiling (which makes it perfect for sous-vide cooking). One roll can honestly last a home cook several months depending on how often they use it.
What You’ll Need Before You Start
- A vacuum sealer machine (any standard countertop model works)
- Your Homepixi vacuum sealer roll
- A pair of scissors (optional, but handy)
- The food you want to seal
- A flat, clean surface to work on
That’s genuinely it. No fancy setup, no additional tools required.
Step 1: Load the Roll Into Your Vacuum Sealer
Most vacuum sealer machines have a built-in roll storage compartment, usually at the back or underneath the lid. Open that compartment, place your roll inside, and thread the end of the film through the cutter guide (if your machine has one).
If your machine doesn’t have a roll holder, you can simply place the roll beside the machine and pull the film out manually as you need it. It works just as well.
Pull out a length of film slightly longer than the food you plan to seal. You’ll need a few extra centimetres on each end for the seal — roughly 3 to 5 cm is enough.
Step 2: Seal One End of the Bag
Here’s where beginners sometimes get confused: the roll gives you a flat sheet of film, not a bag yet. You need to seal one end first to create the bag, then put your food in, and then seal the other end.
To seal one end:
- Lay the open end of the film into the sealing channel of your vacuum sealer machine.
- Select the “Seal Only” function (not vacuum + seal — just seal for now).
- Press the lid down until the machine beeps or the seal light turns off.
- Open the lid and you’ll have a clean, flat seal on one end.
You now have a bag open on one side. That’s exactly what you want.
Step 3: Cut the Bag to Size
If your machine has a built-in cutter, use it to cut the roll at your desired length. If not, use scissors — just cut cleanly across the film so the bag is the right size for your food.
A common mistake here is making the bag too small. Give yourself a bit of room. The food should sit comfortably inside the bag with at least 5 to 7 cm of space above it. That space is what allows the machine to properly vacuum out the air and create a strong seal at the top.
Step 4: Place the Food Inside
Open the unsealed end of your newly made bag and place your food inside. A few things to keep in mind here:
Dry foods are simpler to seal — things like nuts, rice, flour, biscuits, dried spices, or cooked meat work great. The machine can vacuum these without any issue.
Liquids and very wet foods need a little caution. If you’re sealing something like marinated fish or a soup, either freeze it partially before sealing, or tilt the bag slightly upward when placing it in the machine. This stops liquid from getting pulled into the sealing mechanism, which can damage the machine over time.
Sharp or bony foods — like fish with bones, hard pasta, or dried chillies — should ideally be wrapped lightly in paper towel first, or you can pre-freeze them so they don’t puncture the bag during sealing.
Step 5: Vacuum and Seal
This is the satisfying part.
- Place the open end of the bag (with food inside) into the vacuum channel of the machine.
- Close the lid firmly.
- Select “Vacuum + Seal” mode.
- Watch the machine pull all the air out — you’ll visibly see the bag shrink tightly around the food.
- Once the vacuum is done, the machine will automatically seal the bag.
The whole process usually takes 10 to 20 seconds depending on the machine and the size of the bag.
When you open the lid, you should have a tightly sealed bag with no visible air pockets. Give it a gentle press — if it feels firm and airtight, you’ve done it correctly. If there’s a bubble of air, just repeat the process.
Step 6: Label and Store
Once sealed, take a marker pen (or a label) and write the contents and date on the bag. This saves a lot of confusion later — especially if you’re stacking multiple bags in the freezer.
Properly vacuum-sealed food can last:
- In the fridge: 1 to 2 weeks for most fresh foods (compared to 3 to 5 days without sealing)
- In the freezer: 1 to 3 years for meats and cooked meals (versus 6 months with regular freezer bags)
- In the pantry: Several months for dry goods like grains, nuts, and spices
The Homepixi roll is freezer-safe, so you can put the sealed bag straight into the freezer without any extra wrapping or containers.
A Few Tips That Make a Difference
Don’t overfill the bag. If the food is touching the open end, the machine can’t get a clean seal. Leave that gap.
Keep the sealing area clean and dry. Any moisture or food residue right at the edge can prevent a proper seal. Wipe the top of the bag with a clean cloth before sealing if needed.
Double-seal if you’re storing something long-term. You can run the seal function twice on the same edge for extra security — especially useful for items going into the freezer for months.
Reusing bags is possible — but only for dry or solid food, and only if the bag is thoroughly washed and dried first. Never reuse a bag that held raw meat or fish.
For sous-vide cooking: The Homepixi roll is rated safe for boiling temperatures, which means you can place the sealed bag directly into your water bath or pot without it leaking or breaking down. This is a great feature that cheaper rolls often lack.
Why a Good Quality Roll Makes All the Difference
This is worth mentioning because not all vacuum sealer rolls are the same.
Thinner rolls (below 80 microns) tend to puncture easily and don’t hold up well in the freezer. The Homepixi roll is 100 microns thick — that extra thickness means the bag won’t tear when you’re pulling it out of the freezer, and sharp edges from bones or hard food are less likely to poke through.
The embossed texture on the inside of the roll (those little ridges you can feel) is also important. That texture is what allows the vacuum sealer machine to properly draw out air — a smooth bag won’t work as efficiently. Quality rolls like Homepixi’s are made with this texture built in, so the vacuum is even and complete.
Final Thoughts
Vacuum sealer rolls aren’t complicated once you’ve done it once. The steps are simple, the results are immediate, and the difference in how long your food lasts is honestly remarkable.
If you’ve been on the fence about whether it’s worth it — it is. Especially in Indian households where bulk buying vegetables, marinating meat, storing rice and dals, or meal prepping for the week is part of everyday cooking life. A vacuum sealer roll makes all of that more efficient, less wasteful, and keeps your food tasting exactly as it should.
Pick the right roll, follow the steps above, and you’ll be a natural at it by your second or third bag.
faq’s
Yes. The roll is designed to be compatible with all standard countertop vacuum sealer machines — FoodSaver, Bajaj, Philips, and other common brands used in Indian kitchens.
The 20cm roll is great for smaller items: individual portions of fish, snacks, cut vegetables, or dry spices. The 28cm roll gives you more room and works better for larger cuts of meat, whole fish, big vegetable batches, or cooked meals meant for the freezer.
The Homepixi roll is microwave-safe, so you can reheat food directly in the sealed bag. Just leave a small opening at one corner to let steam escape — don’t heat it completely sealed.
Squeeze the bag after sealing. It should feel firm with no give. If you can push air around inside, the seal didn’t take and you’ll want to cut that edge off and try again.